Local Development Setup
Developer Information Only
This section is for developers contributing to Saarthi or those who wish to build and run the extension from source.
To set up Saarthi for local development:
-
Clone the repository:
git clone https://github.com/godspeedsystems/Saarthi.git
cd Saarthi -
Install dependencies: Saarthi uses
pnpmfor package management.pnpm install -
Run the extension for development: You have two primary methods:
-
Directly in VS Code (Recommended for active development):
- Open the cloned
Saarthifolder in VS Code. - Press
F5(or select Run → Start Debugging from the menu). This opens a new VS Code window (Extension Development Host) with Saarthi running. - Changes to the webview code (under
webview-ui/) will often update live. - Changes to the core extension code (under
src/) typically require restarting the Extension Development Host window.
- Open the cloned
-
Building and Installing a VSIX package: This method is useful for testing the packaged extension or distributing development builds.
-
Build the VSIX file:
pnpm buildA
.vsixfile (e.g.,saarthi-<version>.vsix) will be created in thebin/directory. -
Install the VSIX in VS Code:
- Using the command line:
(Replace
code --install-extension bin/saarthi-<version>.vsix<version>with the actual version number in the filename). - Using the VS Code interface:
- Open the Extensions view (
Ctrl+Shift+XorCmd+Shift+X). - Click the "..." (More Actions) menu in the Extensions view sidebar.
- Select "Install from VSIX..."
- Browse to and select the generated
.vsixfile from thebin/directory.
- Open the Extensions view (
- Using the command line:
-
-
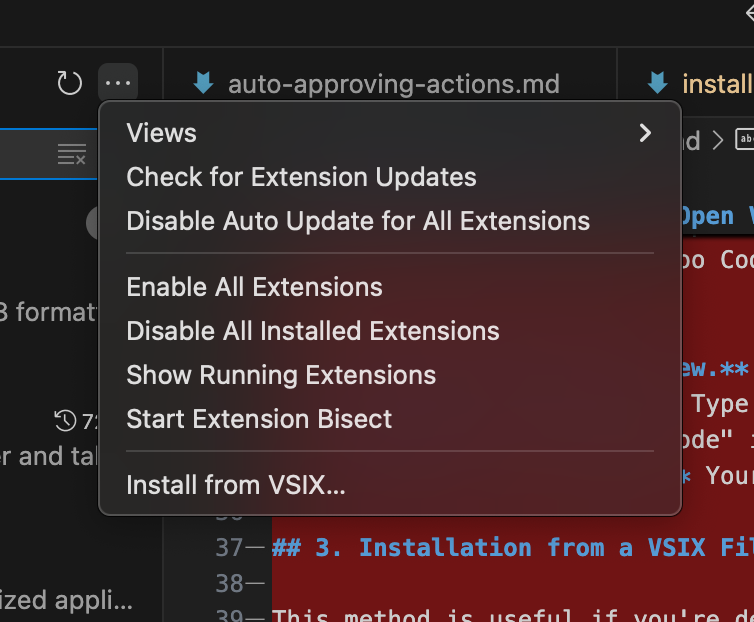 Installing a development VSIX using VS Code's "Install from VSIX..." dialog.